Daily Tech Briefing
AI 科技速览
每天 5 分钟内学习 AI。获取最新的人工智能新闻,理解其重要性,并学习如何将其应用于您的工作。
Hacker News · 2026/7/30 21:18:39
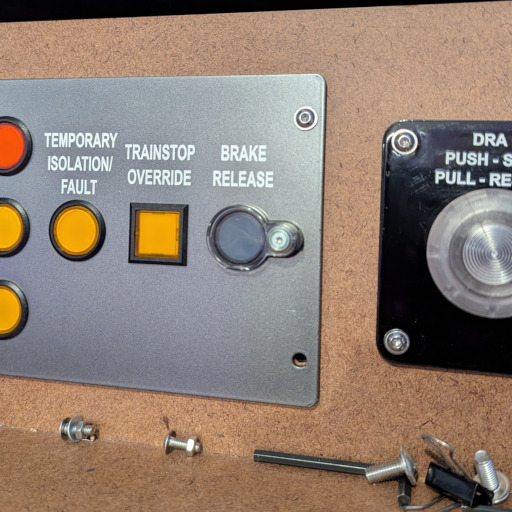
Train Simulator Controller
AI 中文解读
这位硬核玩家用了三年多时间,在自己家里亲手造出了一个仿照英国Class 80x高铁的模拟驾驶舱。他的目标是尽可能还原真实驾驶室里的仪表和控制装置,找不到现成零件就自己动手造,连控制面板的电路板都亲自设计了好几版,最麻烦的六档旋钮开关也是自己拼出来的。最近他分享了一篇项目进展,重点介绍了车头灯控制面板的研发过程,从LED灯的挑选到磨砂扩散板的制作都反复试验,力求效果和真车一致。他的追求和动手能力让人佩服,也让我们看到了一个爱好能玩到什么程度——把对火车的热爱变成一件充满创造力的作品。这也提醒我们,专注做好一件事,过程本身就很精彩。
For over three years, I have been building a physical train simulator in my apartment, modeled on the UK Class 80x (Class 800/801/802/805/810) passenger train. I’ve been trying to replicate the instruments and controls
in the real cab as closely as possible, in many cases managing to acquire real components, and in others building my own replicas. I’ve gone down rabbit holes of design, from a custom CAN bus transceiver board and a variety
of daughterboards to tie the simulator together, to the actual panels on which all of the constrols and instruments are mounted. I usually wait until I complete a component or step before I write a blog post, but over the last half-year, I’ve instead made forward progress on several different aspects of the project. Therefore, this blog post is a status update on these many aspects, each of which will hopefully earn its own dedicated blog post when it is completed.
Headlights
One of the more complex panels on the Class 800 dashboard that doesn’t use an existing instrument or control is the headlight control panel. The real trains have a six-position knob that controls what the head lights (and tail lights) display, a push-on, push-off button to set flashing hazard lights, and a set of LEDs on a diagram of the front of the train that show how the headlights are currently configured. I decided to make my own PCB holding white and red surface-mount LEDs that also acts as a daughterboard for one of the CAN bus transceivers, and breaks out terminals for connecting the selector switch and hazard button. For the PCB, I tested out three options each for the white and the red LEDs, trying to find versions that would have visually similar brightness (and not be too bright). I went through two iterations of the PCB before I landed on the right size, layout, and dimensions, and I also used my current PCB manufacturer of choice, JLC, to make frosted white diffusers for the LEDs connected into one spidery web. Unexpectedly, the hardest part was finding the right selector switch: I knew the manufacturer and even the part number for what I need, but the only way to get it new is to spend hundreds of dollars buying multiples. Therefore, after a few incorrect guesses at eBay listings, I collected all the right parts to cobble together my own six-position selector switch that I believe is exactly what the prototype uses. Of course, I also tested it out with Train Simulator and Train Sim World, although still slightly stymied by Train Sim World not exposing the current output state of LEDs and indicators on trains’ dashboards.
In the eventual dedicated blog post about this panel, I’ll show the PCB iterations, the diffuser, and how the final version works with Train Simulator.
Headlight control panel on a Class 800 EMU
Selecting the best LEDs to use for the headlight position preview
Performing an integration test of the (bright) LEDs in a hardboard version of their panel
Sheet Metal Panels and Labels
Last November, I posted about a hardboard prototype of the center panel of my train simulator, then at the end of December, the full four-section setup that replicates the driver’s controls in a Class 80x EMU. The hardboard version, especially when mounted on the custom table I built, has validated the dashboard concept, but is too fragile to be used long-term. In addition, it doe
分享
阅读原文 ↗